Creating a Private Class with Fixed Tuition
Here's an example of creating a private class that meets once a week for 30 minutes for 3 months. Assume that the total tuition for the 3 month private class is $120. The tuition is payable in 3 equal installments of $40 at the beginning of each month.
Create a Private Class, Create a Tuition Item, Create the Tuition Payment Schedule:
To create the private class, follow these instructions:
- Click on "Classes" in the main-menu.
- Click on "Add Class" in the sub-menu.
- Click on "Advanced Class Setup" to create a private class:
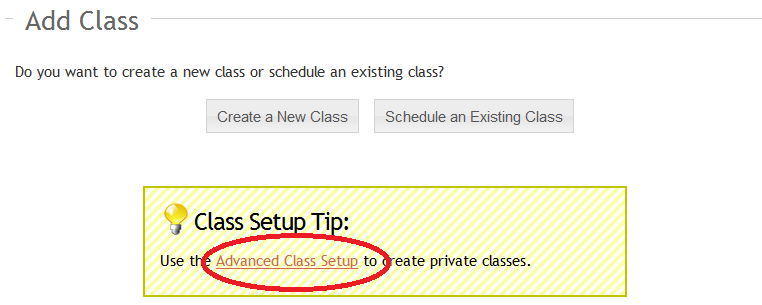
If you don't see the screen with the "Advanced Class Setup" it means you do not have any classes created yet. You can use this link www.studioware-online.com/Services/Classes/AdvancedSetup to go directly to the Advanced Setup.
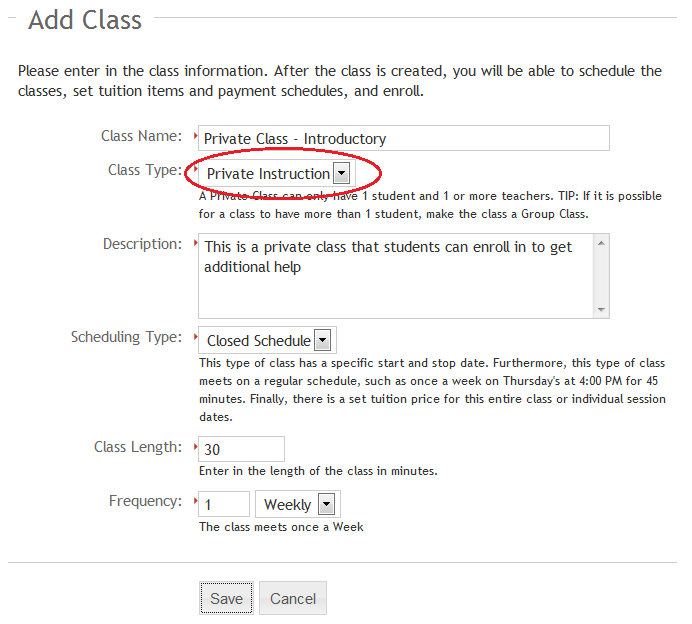
- Enter in the name of the class, select "Private Instruction" as the class type, enter in the description of the class, the class length, and class frequency. Click on the "Save" button to create the new class:
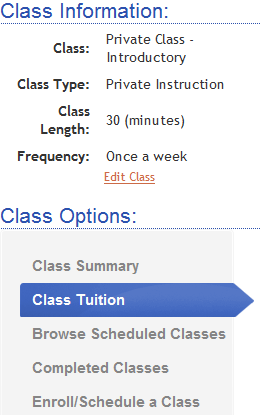
- The private class is now created. Now we need to add the tuition for the class. In our example, the tuition will be $120 for the entire class. After the class is created, you are automatically redirected to "Class Tuition" page:
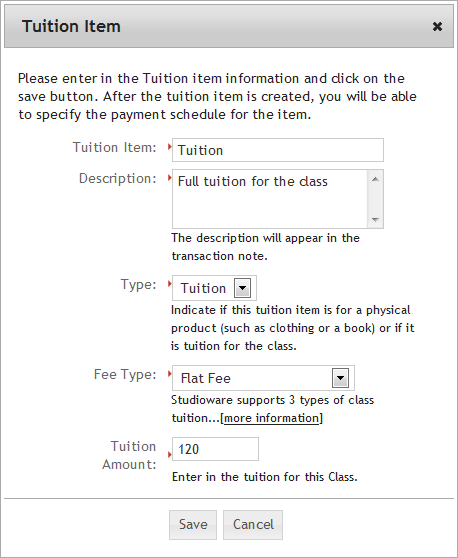
- Click on the "Add Tuition Item" button to add the tuition. Enter in "Tuition" as the name of the tuition item, enter in a description, indicate that this is tuition for the class, indicate that the tuition is "Flat Fee" (that is, tuition for the entire class), and enter in 120 as the tuition. Click on the "Save" button to create the tuition item of $120.
- Now that the tuition item of $120 has been created, we need to tell Studioware has the tuition is to be paid. There are many options for the payment schedule, but in this example, the tuition is due in 3 equal payments at the beginning of the months. By default, Studioware suggests that the "The tuition is evenly divided and payable at each lesson". We don't want this, so we need to remove that payment item:
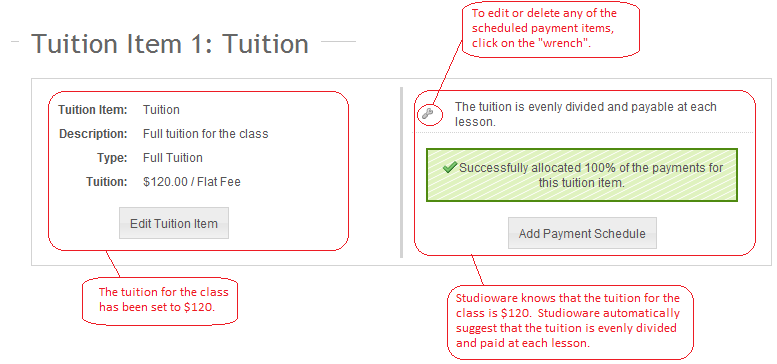
- To delete the payment item "The tuition is evenly divided and payable at each lesson", click on the wrench next to the item and click on the "Delete" button. At this point, there are no scheduled payments:
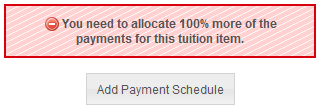
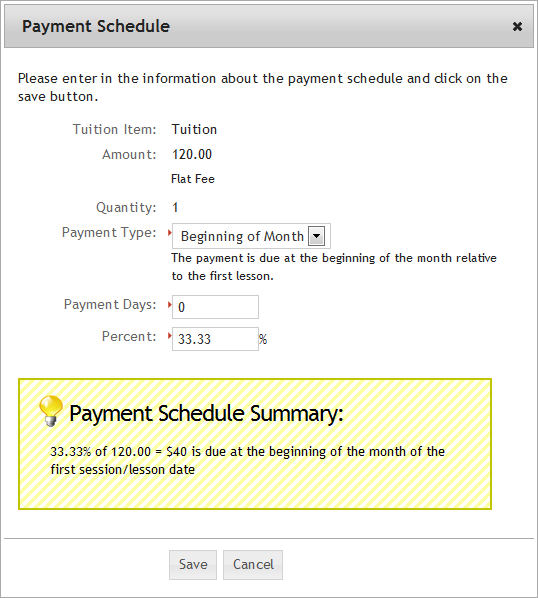
- We need to add our first payment. There are 3 equal payments of $40 that are due at the beginning of the month. In other words, 1/3 (or 33.33%) of the tuition is due at the beginning of month 1, 33.33% of the tuition is due at the beginning of month 2, and finally, 33.34% of the tuition is due at the beginning of month 3.
- Click on the "Add Payment Schedule" to add the first payment. Select "Beginning of Month" as the payment type, enter in 0 to indicate the first month, and enter in 33.33 as the percent:
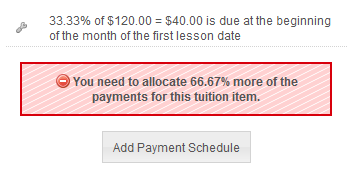
- Click on the "Save" button to create the payment item. The payment item is saved, and notice that the user interface indicates that additional payment items need to be created:
- Repeat step #10 and add the additional payments:
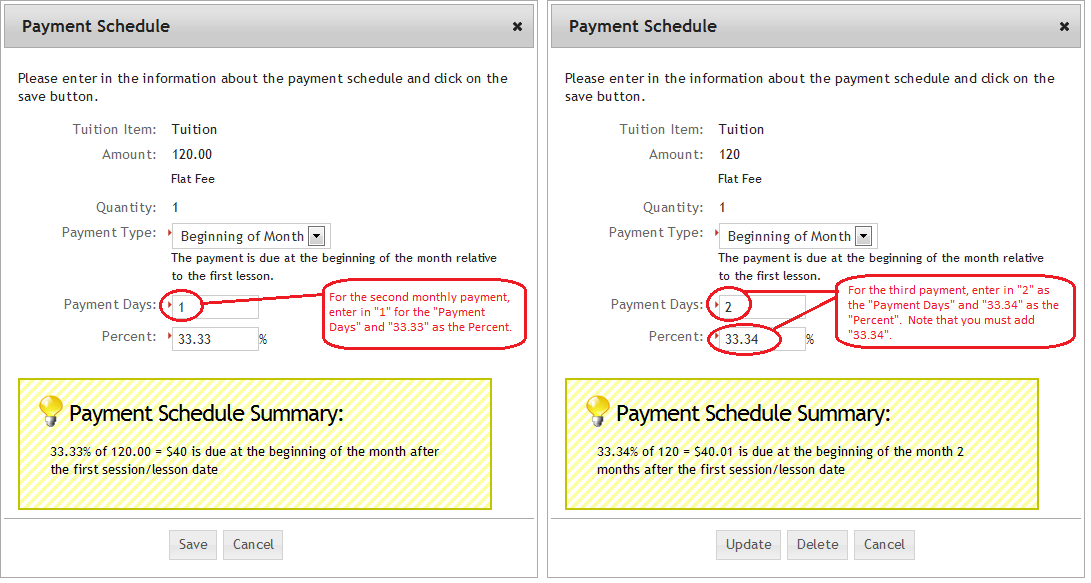
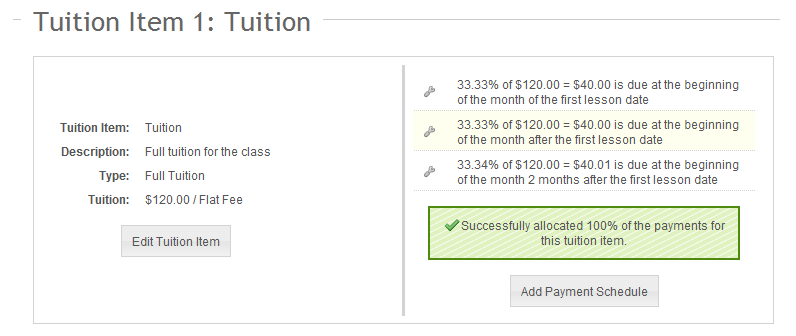
Note:When creating the Payment Schedules, the percentages must add to 100%. In our example of 3 payments, we used the percentages 33.33%, 33.33%, and 33.34%. Notice that the percents add to 100%.
- All the payments have been successfully scheduled:
- Once a class, tuition, and payment schedule have been defined, you can schedule the private class with as many students as needed. As students are enrolled in the class, the tuition ($120) is automatically posted to the student's financial account according to the payment schedule. Based on the class's start and stop date, Studioware will automatically add the tuition transactions (and any applicable discount transactions) to the student's account with the correct dates.
Scheduling a Private Class
The private class has been created, the tuition has been assigned, and the tuition payment schedule has been created. You are now ready to schedule the private class. To schedule a class, follow these instructions:
- Click on "Classes" in the main menu.
- The newly created class "Private Class - Introductory" will be displayed in the class list:

- Click on the "Schedule a Class" button to schedule a class. Enter in the class start date, stop date, class time, and location:
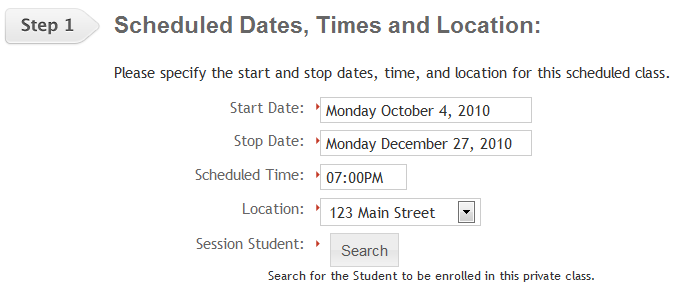
- Since this is a private class, only one student can register for the class at a time. Click on the "Search" button to search for the student to enroll in this private class:
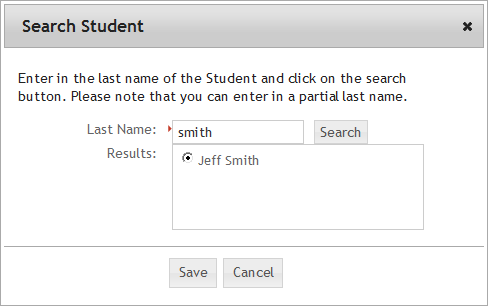
- The student "Jeff Smith" will now be schedule to take this private class from Monday October 4, 2010 to Monday December 27, 2010 at 7:00 PM:

- Now you need to identify the teacher that will teach this private class. Select one or more teachers for this private class:

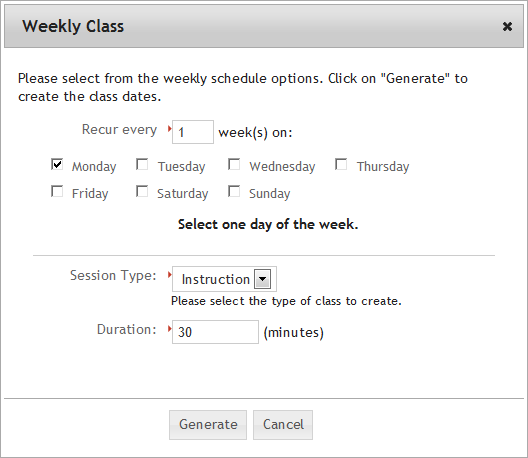
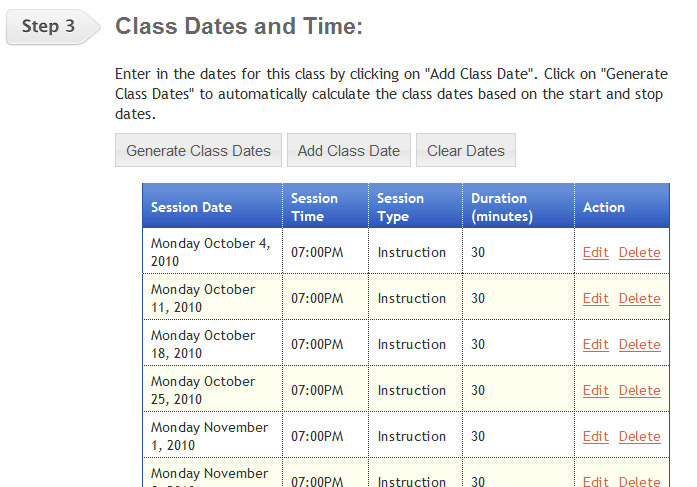
- To complete the scheduling of the private class, you need to specify all the dates the class will meet. This is easily accomplished by clicking on the "Generate Class Dates" button, which will show the following pop-up screen. Studioware knows that this class meets once a week. All you need to do is simply indicate if the "Session Type" is for instruction or practice. Click on "Generate" to generate all the class date/times:
- The class dates will be generated. You can edit, delete, or add additional dates:
- Click on the "Save" button to schedule the private class with "Jeff Smith".
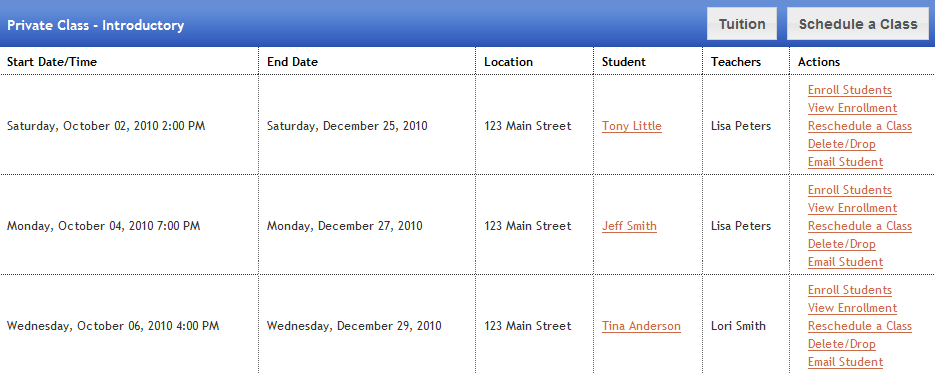
- Repeat this process again for additional students. In the example below, the students "Tony Little" and "Tina Anderson" have also been enrolled in the class:
Studioware Accounting
When the students "Jeff Smith", "Tony Little", and "Tina Anderson" were enrolled in the class "Private Class - Introductory", the tuition was automatically posted to the student's account. For example, Tony Little's account appears as follows: 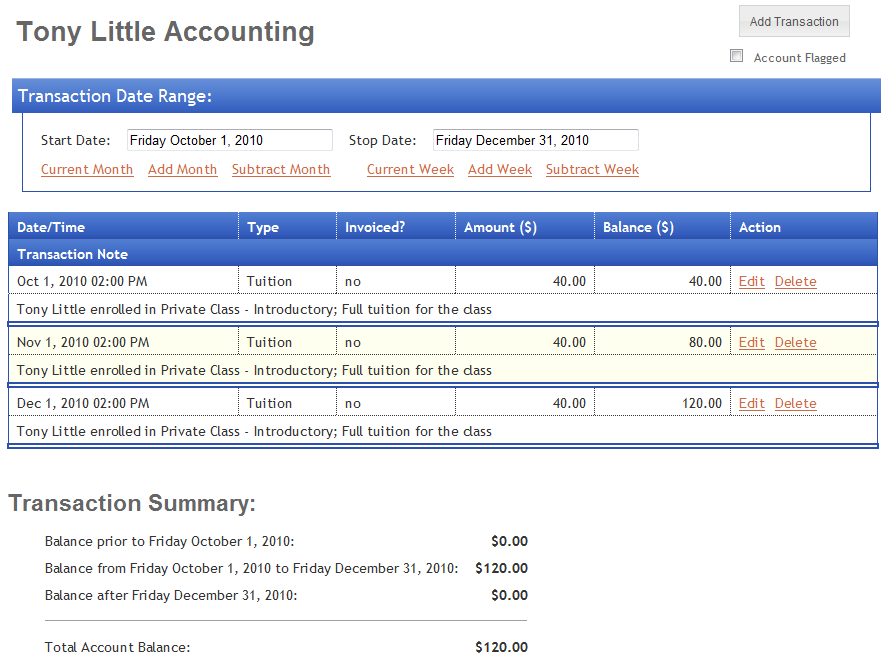
Notice that Tony's account has a total tuition of $120 which payable by $40 at the beginning of the month for 3 months. Now you can create an invoice with Studioware and sent Tony's payees the bill.
Staff Schedule
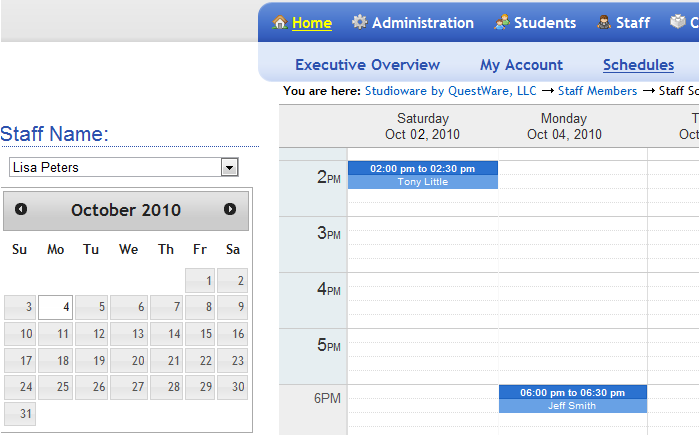
In our example, the staff member "Lisa Peters" has 2 private classes with Tony Little and Jeff Smith. You can see the staff member's schedule on a calendar:
