Receipts
Studioware allows you to print or email receipts from the student/family financial accounts. To get started with receipts, you first need to create a "receipt" custom letter. After the receipt custom letter is complete, Studioware will insert the financial transactions into the custom letter and print or email the letter. To get started, let's create a custom letter that will be used as a receipt.
Creating the Receipt Custom Letter Template:
To create a Receipt Custom Letter, follow these instructions:
- Click on "Communication" in the main toolbar.
- Click on "Custom Letter" in the sub-toolbar.
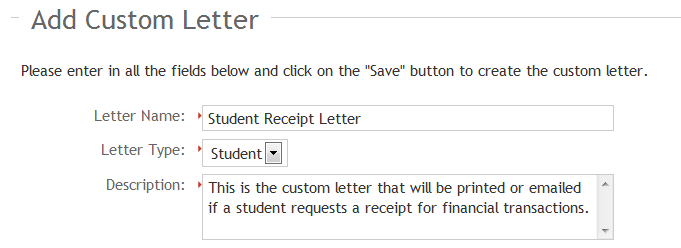
- Enter in the name of the letter, select "Student" as the letter type, and enter in a description:
 Important Note:
In order for a custom letter to be considered a receipt, the word "Receipt" must be in the letter name. In the example above, the custom letter name is "Student Receipt Letter". This custom letter will be considered a receipt because the word "Receipt" is in the letter name
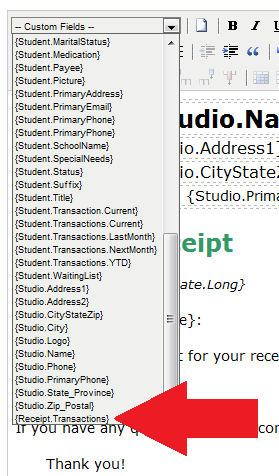
- Enter in the letter content to be used for the receipt. Also include the letter merge field {Receipt.Transactions} in the custom letter. The {Receipt.Transactions} letter merge field will be populated with the selected transactions from a student's financial account:
For example, a receipt custom letter may appear as follows: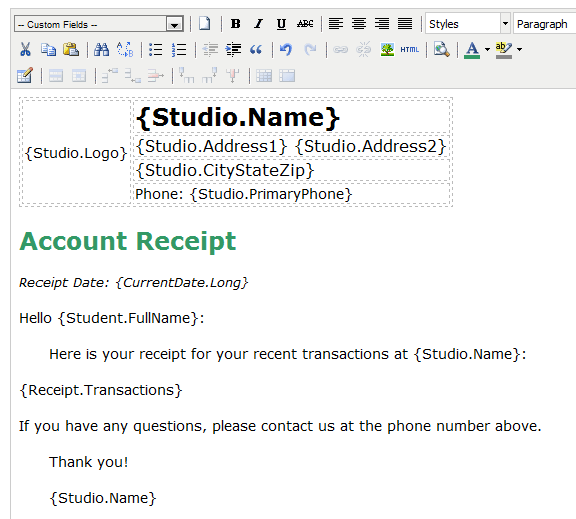
- Click on "Save" to save your newly created Receipt Custom Letter.
It's possible to create multiple receipt custom letters. When you print/email the receipt, you can select which receipt to use. Remember, the word "Receipt" needs to be in the letter name of each receipt you create.
Printing or Emailing the Receipt
Now that you have the Receipt Custom Letter created, it's easy to create a receipt for any student or family. To create a receipt for a student/family, follow these instructions:
- Open the student's record. You can open the student record by selecting the student from the student list, searching for a student, selecting to "View" a student from a class's enrollment list, and so on.
- Once you have the student's record open, click on "Accounting/Transactions" to view the student's financial account.
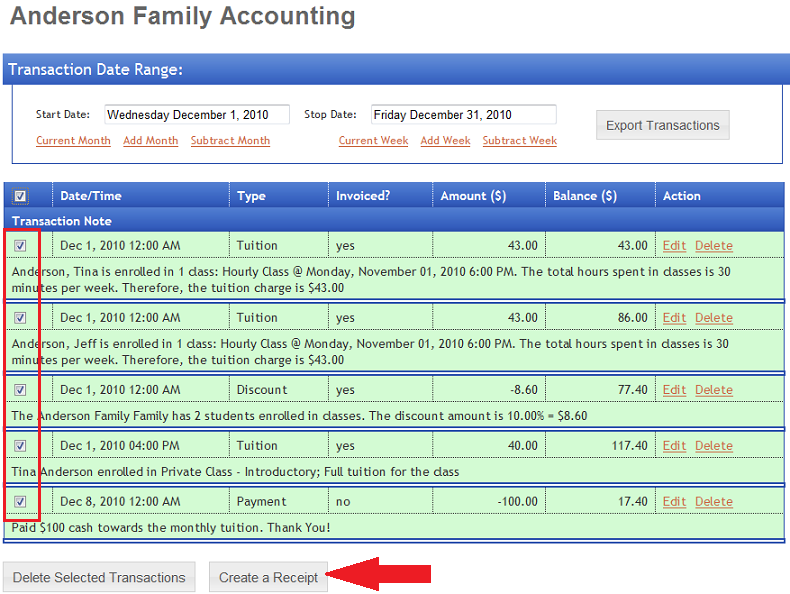
- Select the financial transactions that will appear on the receipt.
- Click on the "Create a Receipt" button:
- Select the "Receipt Type" and indicate if you want to email or print the receipt:
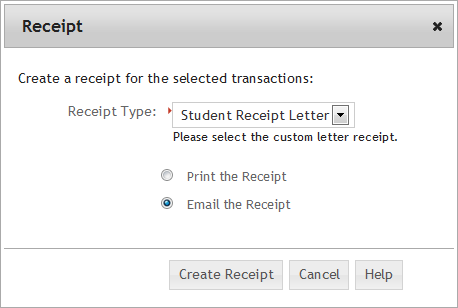
- If you decide to email the receipt, the email will be sent to all email accounts defined on the student's record. It will take approximately 30 minutes before the receipt is sent. Please note that the emailed receipt is not sent to the student's contacts.
- If you decide to print your receipt, the receipt will be displayed in a pop-up window and you will be able to print the receipt.