Variable Class Accounting
Assume that you have created classes and set the tuition for the classes to use the "Tuition Fee Schedule". When a student enrolls in a class that is set to use the Tuition Fee Schedule, there are no automatic tuition transactions added to the student's financial account at the time of enrollment. Once a month you must add the tuition and discounts to the student's financial account by clicking on "Accounting" in the main menu and "Calculate Variable Tuition" in the side menu. You use this web page to allow Studioware to calculate the total number of classes, the total hours of classes, the total tuition based on the tuition fee schedule, and any applicable discounts. You need to do this once a month to accumulate the tuition and discount transactions and add them to the student's accounts.
The process of calculating the total tuition and discount charges based on the count and number of hours enrolled is a complicated process. To make it easier to understand, we broke the process down into 3 steps:

Step 1:
In step 1, your select the month and year and click on the "Go" button. Studioware will search all enrollment for the selected month and year in classes that are set to use a Tuition Fee Schedule. Studioware calculates the total number of classes each student is enrolled in, the total number of hours of classes, the tuition charge based on the tuition fee schedule, and any applicable discounts. All of this information is displayed in a table when the calculations are finished:

Step 1 is now complete. Step 1 only performs the calculations. You can select a different month and year (or the same month and year if you want to refresh the calculations) and click on "Go". Step 1 does not add the transactions to the student's accounts, it simply calculates the tuition and discount and displays the information in the table.
Step 2:
Step 2 allows you to manipulate the tuition and discount transactions. You can change any of the tuition values, edit the tuition notes, modify the multi-class and multi-family discounts, and remove any transaction by un-checking the check box in the left-most column. Step 2 allows you to print and/or export the tuition and discount transactions so you can review all the transactions. For example, you can print the list of tuition and discount transactions and exit Studioware. You can then make your modifications on the printed paper and return to Studioware at a later date and start again at Step 1. You can use your notes on the printed paper to change the values. It's important to get all the tuition, discounts, and notes correct because these are the transactions that will be added to the student's accounts.
Step 3:
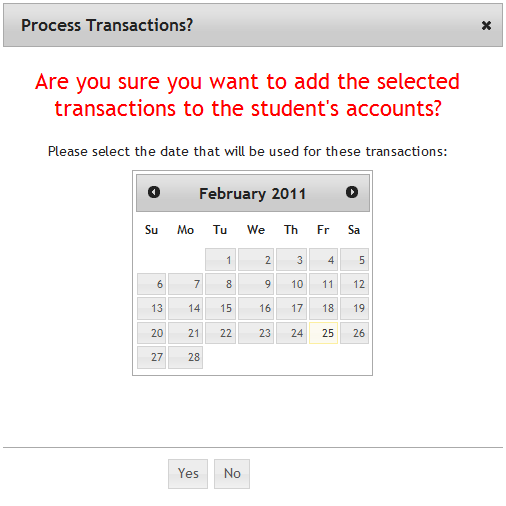
After you have modified any tuition, discounts, and notes, you are ready to add the transactions to the student's financial accounts. In step 3, click on the "Process Transactions" button. The following window will be displayed to confirm that you want to add the transactions to the student's accounts:

Select the date from the calendar that will be used for all of the transactions, and click on the "Yes" button if you are ready to add the transactions to the student's financial accounts. The transactions will be added to the student's accounts and you will be ready to create invoices.